Make a canvas with Image.new("RGB", (total_width, max_height)), then
canvas.paste(img, (x, y)) each image, adding the previous widths to x. Resize the images to a
common height (for a row) or width (for a column) first if you don't want gaps.
Two images side by side
The images here have different shapes, so we scale both to 600 px high first. Each width follows from its own aspect ratio:
from PIL import Image

a = Image.open("photo.jpg")       # 1600 x 1067, landscape
b = Image.open("portrait.jpg")    # 800 x 1200, portrait

# Scale both to the same height, keeping each one's aspect ratio
h = 600
a = a.resize((round(a.width * h / a.height), h), Image.LANCZOS)
b = b.resize((round(b.width * h / b.height), h), Image.LANCZOS)

canvas = Image.new("RGB", (a.width + b.width, h))
canvas.paste(a, (0, 0))
canvas.paste(b, (a.width, 0))     # x offset = width of everything to the left
canvas.save("side_by_side.jpg", quality=90)
print(a.size, b.size, "->", canvas.size)(900, 600) (400, 600) -> (1300, 600)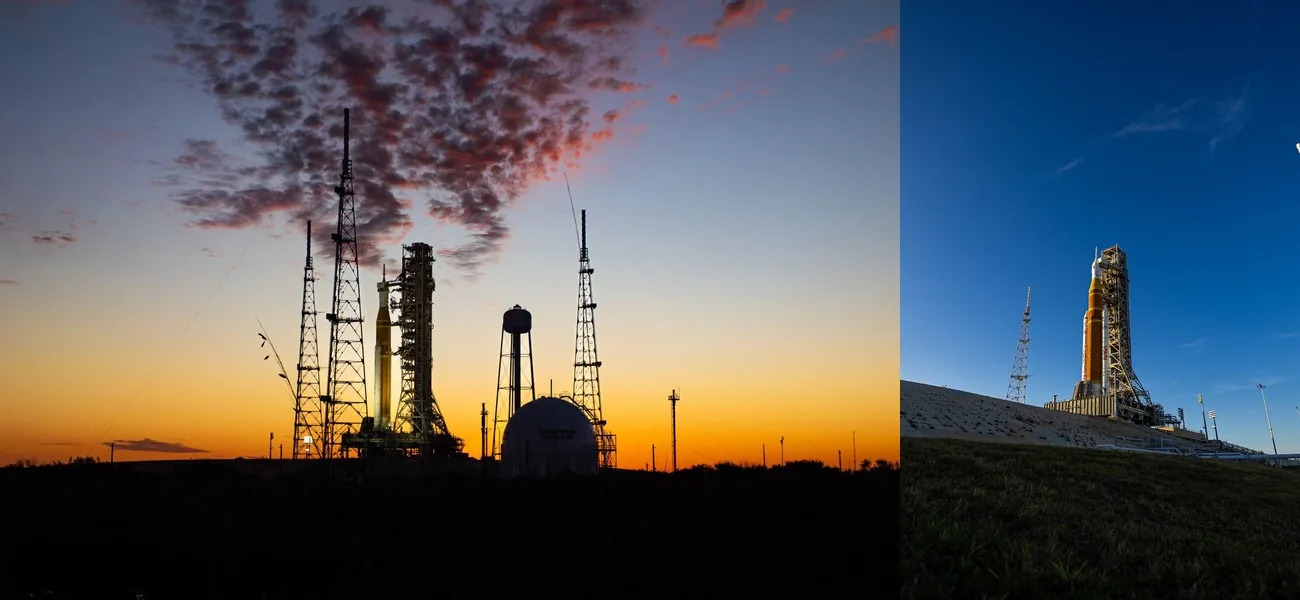
To stack vertically, swap the roles: scale to a common width, make the canvas (width, a.height + b.height)
and paste the second image at (0, a.height).
Any number of images, any sizes
When you would rather not resize, put the images on a background and align them. This function handles rows and columns, gaps, alignment and transparent PNGs:
from PIL import Image


def concat(images, direction="horizontal", gap=0, bg="white", align="center"):
    """Join images in a row or column. Images may differ in size; smaller ones are aligned."""
    horizontal = direction == "horizontal"
    along = [im.width if horizontal else im.height for im in images]
    across = [im.height if horizontal else im.width for im in images]
    length, depth = sum(along) + gap * (len(images) - 1), max(across)
    canvas = Image.new("RGB", (length, depth) if horizontal else (depth, length), bg)
    pos = 0
    for im, a, c in zip(images, along, across):
        offset = {"start": 0, "center": (depth - c) // 2, "end": depth - c}[align]
        xy = (pos, offset) if horizontal else (offset, pos)
        canvas.paste(im, xy, im if im.mode == "RGBA" else None)   # keep transparency
        pos += a + gap
    return canvas


photos = [Image.open(p) for p in ["photo.jpg", "portrait.jpg", "logo.png"]]
for im in photos:
    im.thumbnail((400, 400))
row = concat(photos, gap=20, bg="#e2e8f0")
col = concat(photos, "vertical", gap=20, bg="#e2e8f0", align="start")
row.save("row.png")
print("row:", row.size, " column:", col.size)row: (1107, 400) column: (400, 947)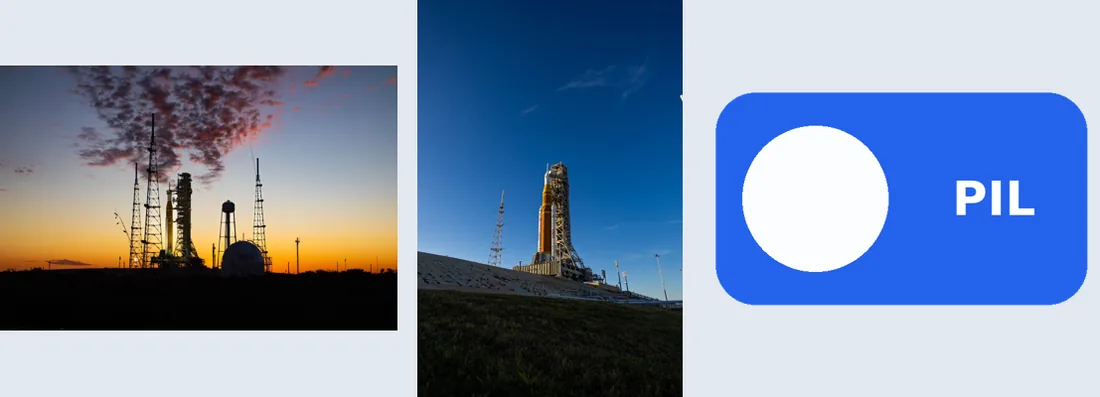
concat(photos, gap=20): different heights, centred.The third argument to paste() is a mask. Passing the RGBA image itself as its own mask keeps the logo's
rounded corners transparent instead of black. More on that in
pasting transparent images.
A grid or contact sheet
For a grid, compute each cell's position from its index: column i % cols, row i // cols.
ImageOps.pad() fits each image inside its cell without cropping or distortion:
from pathlib import Path
from PIL import Image, ImageDraw, ImageFont, ImageOps

files = sorted(Path("photos").iterdir())
cols, cell, pad, label_h = 2, (360, 240), 16, 26
rows = -(-len(files) // cols)                       # ceiling division
font = ImageFont.truetype("DejaVuSans.ttf", 15)

sheet = Image.new("RGB", (cols * (cell[0] + pad) + pad, rows * (cell[1] + label_h + pad) + pad), "white")
draw = ImageDraw.Draw(sheet)
for i, path in enumerate(files):
    with Image.open(path) as im:
        thumb = ImageOps.pad(im.convert("RGB"), cell, color="#f1f5f9")   # fit inside the cell, letterboxed
    x = pad + (i % cols) * (cell[0] + pad)
    y = pad + (i // cols) * (cell[1] + label_h + pad)
    sheet.paste(thumb, (x, y))
    draw.text((x, y + cell[1] + 5), f"{path.name}  {im.width}x{im.height}", font=font, fill="#334155")
sheet.save("contact_sheet.jpg", quality=90)
print(len(files), "images ->", sheet.size)4 images -> (768, 580)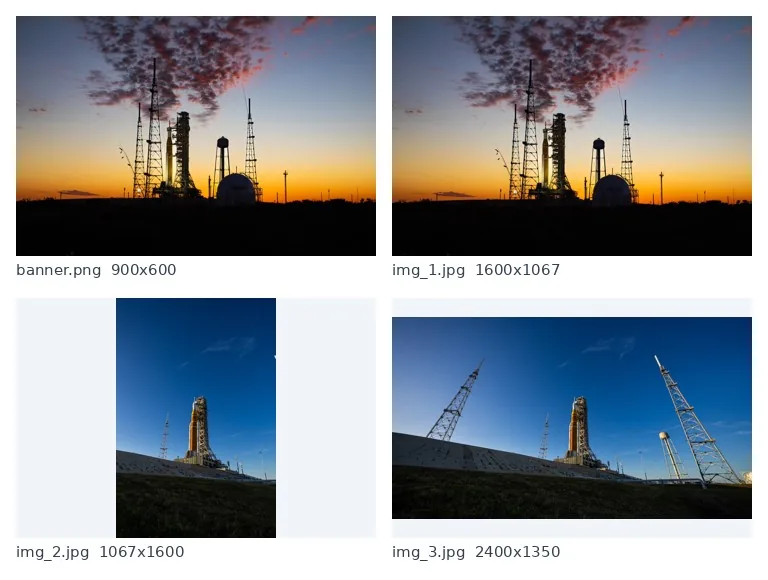
Use ImageOps.fit() instead of pad() if you prefer cells filled edge to edge, cropping whatever
does not fit.
TypeError: 'float' object cannot be interpreted as an integer
Positions and sizes must be integers. Dividing with / always produces a float, even when the result is whole:
from PIL import Image

a = Image.open("photo.jpg")
canvas = Image.new("RGB", (a.width * 2, a.height))
canvas.paste(a, (a.width / 2, 0)) # / gives a floatTraceback (most recent call last):
...
TypeError: 'float' object cannot be interpreted as an integerUse // (integer division) or wrap the value in round() or int(). The same applies to
the size you pass to Image.new() and resize().
With NumPy
np.hstack and np.vstack work too, but only on arrays whose other dimensions match exactly, and
they cannot add gaps or alignment:
import numpy as np
from PIL import Image

a = np.asarray(Image.open("photo.jpg"))
b = np.asarray(Image.open("portrait.jpg"))
try:
    np.hstack([a, b])
except ValueError as e:
    print("ValueError:", e)

b = np.asarray(Image.open("portrait.jpg").resize((1600, 1067)))   # same shape, but now distorted
print(np.hstack([a, b]).shape, np.vstack([a, b]).shape)ValueError: all the input array dimensions except for the concatenation axis must match exactly, but along dimension 0, the array at index 0 has size 1067 and the array at index 1 has size 1200
(1067, 3200, 3) (2134, 1600, 3)Convert back with Image.fromarray(). See Pillow and NumPy.
Overlapping instead of joining: blend and fade
To merge two images on top of each other, use Image.blend() for a uniform mix, or
Image.composite() with a mask to decide pixel by pixel. Both need images of the same size and mode:
from PIL import Image

a = Image.open("photo.jpg").resize((800, 534))
b = Image.open("photos/img_3.jpg").resize((800, 534))
Image.blend(a, b, alpha=0.5).save("blend.jpg")                   # 50/50 mix of every pixel

mask = Image.linear_gradient("L").rotate(90).resize(a.size)       # black on the left, white on the right
Image.composite(a, b, mask).save("fade.jpg")                     # a where the mask is white, b where black
print("done")done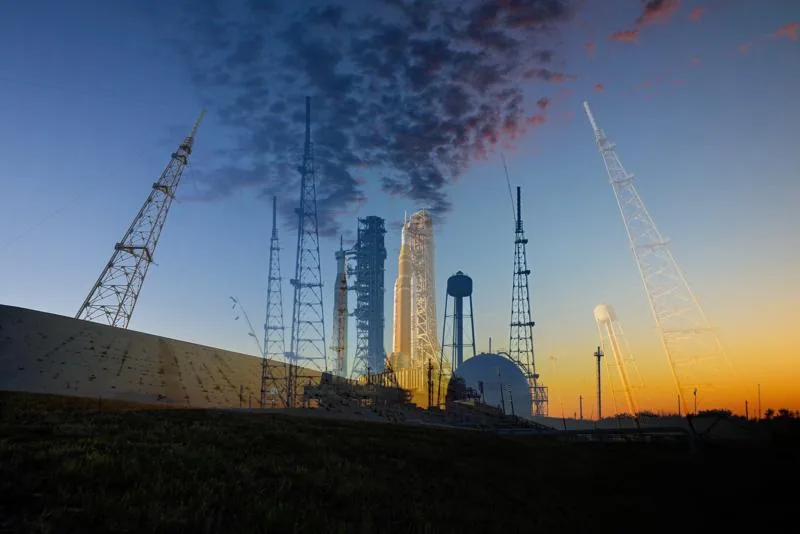
Image.composite() with a horizontal gradient mask.Related
The outputs and images on this page are the real results of running every example with Pillow 12.3.0 on Python 3.13 (Linux) on 2026-10-15. Every example is also re-run automatically on macOS (Darwin 25.6.0, Pillow 12.3.0), Linux (Linux 6.17.0-1022-azure, Pillow 12.3.0), Windows (Windows 2025Server, Pillow 12.3.0); the line under each example shows the result per operating system. The DejaVu Sans font files sit next to each script so font examples behave the same everywhere. Sample photos: NASA/Sam Lott, public domain. Spotted something wrong? Tell us.