draw = ImageDraw.Draw(img), load a font with ImageFont.truetype("path/to/font.ttf", size),
then draw.text((x, y), "text", font=font, fill="white"). To centre text, pass the centre point and
anchor="mm".
The basics
from PIL import Image, ImageDraw, ImageFont

img = Image.open("photo.jpg")
draw = ImageDraw.Draw(img)
font = ImageFont.truetype("DejaVuSans-Bold.ttf", 72)

draw.text((60, 60), "Hello, Pillow", font=font, fill="white")
img.save("hello.jpg", quality=90)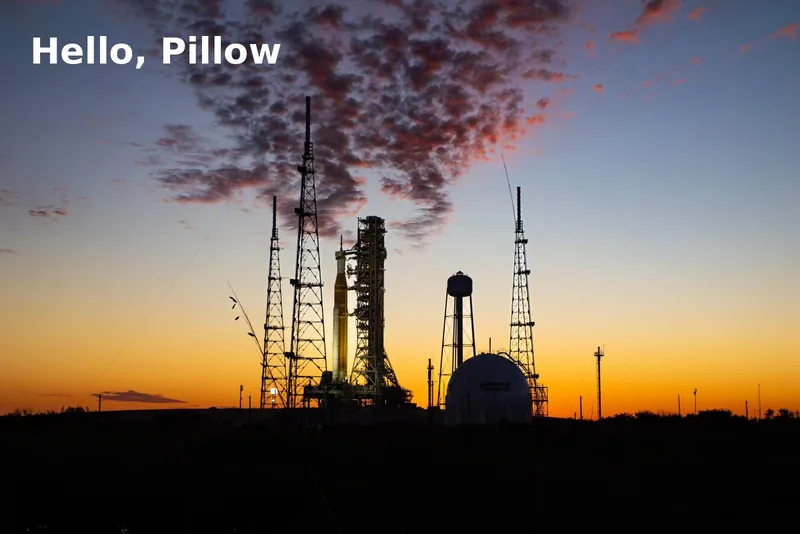
Three things to know from the start:
ImageDraw.Draw(img)draws directly ontoimg. Callimg.copy()first if you need the original.- Use a real font file. Without
font=you get Pillow's built-in font at 10 px. The font argument is a file path; if Pillow cannot find it you getOSError: cannot open resource. For a size-adjustable fallback, useImageFont.load_default(size=72)(Pillow 10.1+). (x, y)is, by default, the top-left of the text's ascender line, not the top of the letters. That is what anchors change.
Positioning with anchors
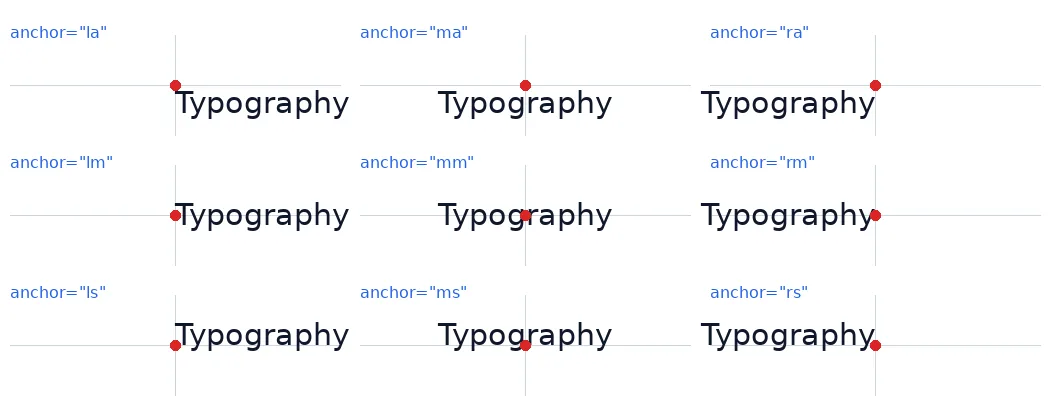
The anchor argument says which point of the text sits at (x, y). It is two letters. The first is horizontal:
l = left, m = middle, r = right. The second is vertical:
a = ascender, t = top, m = middle, s = baseline,
b = bottom, d = descender. The red dot is the
(x, y) each call received:
from PIL import Image, ImageDraw, ImageFont

font = ImageFont.truetype("DejaVuSans.ttf", 30)
label = ImageFont.truetype("DejaVuSans.ttf", 16)
img = Image.new("RGB", (1050, 420), "white")
draw = ImageDraw.Draw(img)

for row, v in enumerate("ams"):            # ascender, middle, baseline
    for col, h in enumerate("lmr"):        # left, middle, right
        x, y = 175 + col * 350, 85 + row * 130
        anchor = h + v
        draw.line((x - 165, y, x + 165, y), fill="#cbd5e1")
        draw.line((x, y - 50, x, y + 50), fill="#cbd5e1")
        draw.text((x, y), "Typography", font=font, fill="#0f172a", anchor=anchor)
        draw.ellipse((x - 5, y - 5, x + 5, y + 5), fill="#dc2626")
        draw.text((x - 165, y - 62), f'anchor="{anchor}"', font=label, fill="#2563eb")
img.save("anchors.png")Anchors are the cleanest way to align text: "mm" to centre, "rs" to right-align numbers on a
baseline, "ls" for captions along the bottom. They replace the old pattern of measuring text with
textsize(), which was removed in Pillow 10.
Centre text on an image
from PIL import Image, ImageDraw, ImageFont

img = Image.open("photo.jpg")
draw = ImageDraw.Draw(img)
font = ImageFont.truetype("DejaVuSans-Bold.ttf", 110)

draw.text((img.width / 2, img.height * 0.3), "ARTEMIS II", font=font,
          fill="white", anchor="mm")
img.save("centred.jpg", quality=90)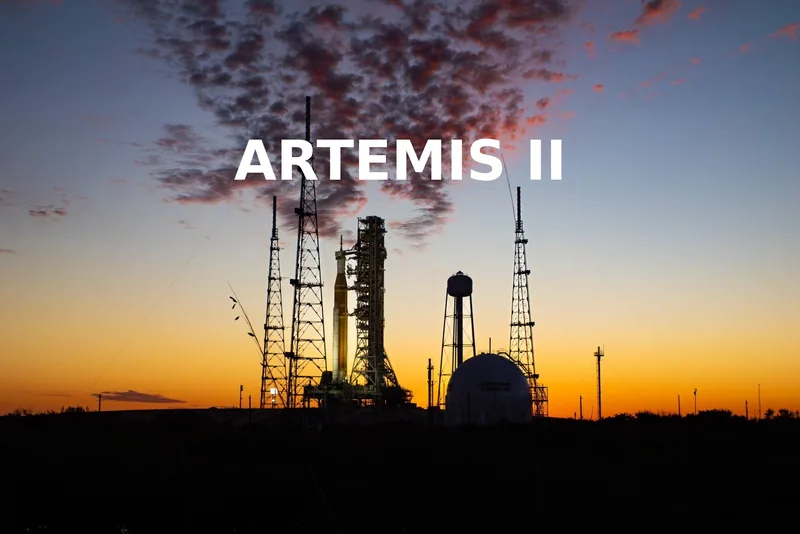
"mm" centres the font's line box. For a single word without descenders that can look a few pixels high; the
textsize page shows how to centre the
visible ink exactly instead.
Make text readable: outline or background
Outline (stroke)
stroke_width and stroke_fill draw an outline around each glyph. It keeps text readable on any background:
from PIL import Image, ImageDraw, ImageFont

img = Image.open("photo.jpg")
draw = ImageDraw.Draw(img)
font = ImageFont.truetype("DejaVuSans-Bold.ttf", 120)

draw.text((img.width / 2, img.height * 0.17), "LAUNCH DAY", font=font, anchor="mm",
          fill="white", stroke_width=6, stroke_fill="black")
img.save("outline.jpg", quality=90)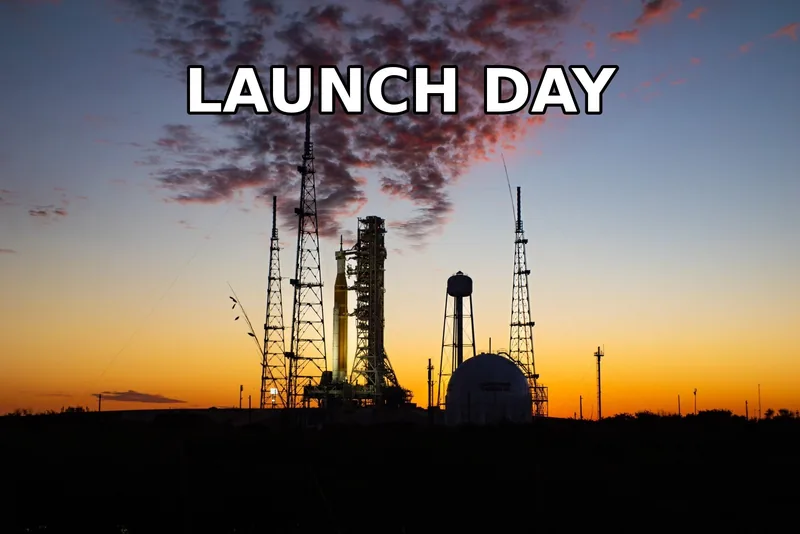
Semi-transparent box behind the text
Drawing with an alpha value onto an RGB image does not blend. Draw on a transparent RGBA layer and composite it:
from PIL import Image, ImageDraw, ImageFont

img = Image.open("photo.jpg").convert("RGBA")
overlay = Image.new("RGBA", img.size, (0, 0, 0, 0))     # transparent layer
draw = ImageDraw.Draw(overlay)
font = ImageFont.truetype("DejaVuSans.ttf", 56)

text = "Launch Pad 39B at sunset, 31 January 2026"
x, y = 60, 120                      # over the bright sky, where a backdrop is needed
left, top, right, bottom = draw.textbbox((x, y), text, font=font, anchor="ls")
pad = 24
draw.rounded_rectangle((left - pad, top - pad, right + pad, bottom + pad),
                       radius=18, fill=(0, 0, 0, 150))       # 150/255 opacity
draw.text((x, y), text, font=font, fill=(255, 255, 255, 255), anchor="ls")

result = Image.alpha_composite(img, overlay).convert("RGB")
result.save("caption.jpg", quality=90)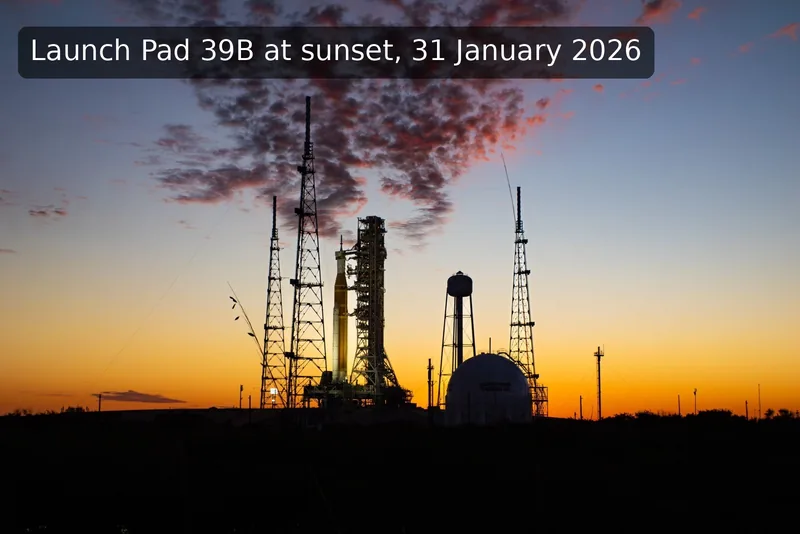
Wrap long text to a width
Pillow does not wrap text for you. Measure words with font.getlength() (the advance width in pixels) and build
lines yourself. textwrap from the standard library counts characters, not pixels, so it wraps proportional
fonts unevenly.
from PIL import Image, ImageDraw, ImageFont


def wrap(text, font, max_width):
    """Split text into lines that fit max_width pixels."""
    lines, line = [], ""
    for word in text.split():
        trial = f"{line} {word}".strip()
        if font.getlength(trial) <= max_width:
            line = trial
        else:
            if line:
                lines.append(line)
            line = word
    if line:
        lines.append(line)
    return "\n".join(lines)


quote = ("Pillow can open, edit and save dozens of image formats, "
         "and drawing text is one of the most common things people use it for.")
font = ImageFont.truetype("DejaVuSans.ttf", 40)
img = Image.new("RGB", (900, 420), "#0f172a")
draw = ImageDraw.Draw(img)

wrapped = wrap(quote, font, max_width=img.width - 160)
print(wrapped)
draw.multiline_text((img.width / 2, img.height / 2), wrapped, font=font, fill="white",
                    anchor="mm", align="center", spacing=14)
img.save("wrapped.png")Pillow can open, edit and save
dozens of image formats, and
drawing text is one of the most
common things people use it for.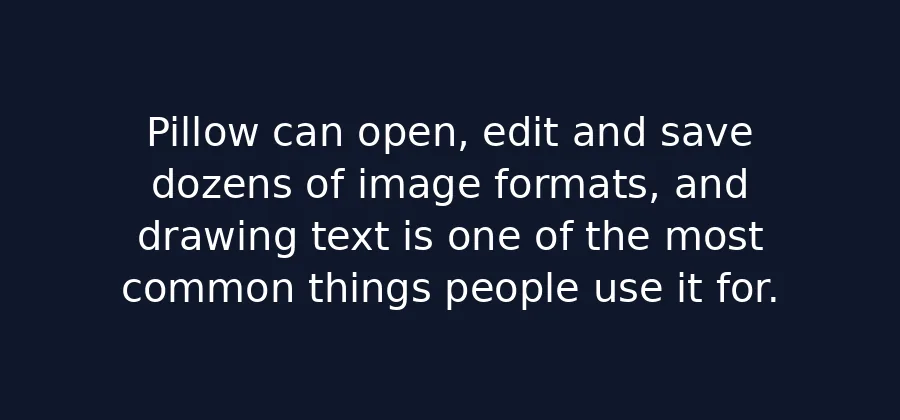
Shrink text to fit a box
For titles of unknown length, such as product names or generated thumbnails, step the font size down until the text fits:
from PIL import ImageDraw, ImageFont, Image


def fit_font(draw, text, font_path, box_w, box_h, start=200, minimum=8):
    """Largest font size at which text fits inside box_w x box_h."""
    size = start
    while size > minimum:
        font = ImageFont.truetype(font_path, size)
        left, top, right, bottom = draw.multiline_textbbox((0, 0), text, font=font)
        if right - left <= box_w and bottom - top <= box_h:
            return font
        size -= 2
    return ImageFont.truetype(font_path, minimum)


draw = ImageDraw.Draw(Image.new("RGB", (1, 1)))
for text in ["Hi", "Hello, Pillow", "A much longer headline"]:
    font = fit_font(draw, text, "DejaVuSans-Bold.ttf", box_w=600, box_h=120)
print(f"{text!r:<26} -> size {font.size}")'Hi' -> size 158
'Hello, Pillow' -> size 84
'A much longer headline' -> size 44For many sizes, a binary search is faster than stepping down by 2, but for one-off images this is plenty.
Rotated text and watermarks
draw.text() cannot rotate. Draw onto a separate transparent image, rotate that, and composite it:
from PIL import Image, ImageDraw, ImageFont

img = Image.open("photo.jpg").convert("RGBA")
font = ImageFont.truetype("DejaVuSans-Bold.ttf", 90)

# 1. Draw the text on its own transparent layer, just big enough for it.
left, top, right, bottom = font.getbbox("SAMPLE")
layer = Image.new("RGBA", (right + 20, bottom + 20), (0, 0, 0, 0))
ImageDraw.Draw(layer).text((10, 10), "SAMPLE", font=font, fill=(255, 255, 255, 140))

# 2. Rotate the layer (expand=True keeps the corners), then paste it using itself as the mask.
layer = layer.rotate(30, expand=True, resample=Image.BICUBIC)
img.alpha_composite(layer, ((img.width - layer.width) // 2, (img.height - layer.height) // 2))
img.convert("RGB").save("rotated.jpg", quality=90)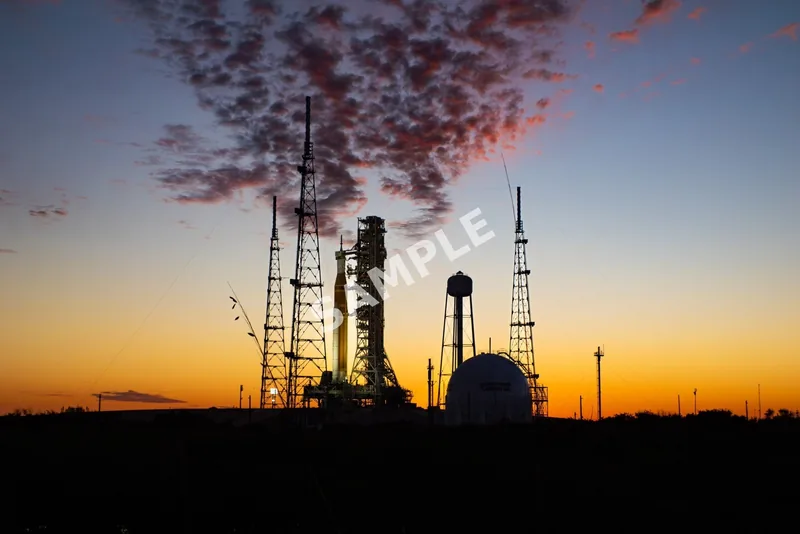
For tiled, logo or positioned watermarks, the watermark generator builds the code for you.
Non-Latin scripts and emoji
Arabic, Hebrew, Hindi and other complex scripts need the Raqm layout engine for correct shaping and right-to-left order. Pillow's Linux and macOS wheels include it; on Windows it also needs the FriBiDi DLL. Every script also needs a font that contains its glyphs:
from PIL import Image, ImageDraw, ImageFont, features

print("raqm layout engine available:", features.check("raqm"))

img = Image.new("RGB", (760, 330), "white")
draw = ImageDraw.Draw(img)
latin = ImageFont.truetype("DejaVuSans.ttf", 44)
cjk = ImageFont.truetype("/usr/share/fonts/truetype/wqy/wqy-zenhei.ttc", 44)
emoji = ImageFont.truetype("/usr/share/fonts/truetype/noto/NotoColorEmoji.ttf", 109)

draw.text((30, 20), "Hello / Привет / Γειά", font=latin, fill="#0f172a")
draw.text((730, 90), "مرحبا بالعالم", font=latin, fill="#0f172a", anchor="ra")   # right-to-left, shaped
draw.text((30, 160), "你好,世界", font=cjk, fill="#0f172a")

# Colour emoji fonts are bitmaps at one size: load at 109, draw, then scale the layer.
e = Image.new("RGBA", (400, 140), (0, 0, 0, 0))
ImageDraw.Draw(e).text((0, 0), "🎨🐍📷", font=emoji, embedded_color=True)
e = e.resize((e.width * 60 // 109, e.height * 60 // 109), Image.LANCZOS)
img.paste(e, (330, 230), e)
img.save("scripts.png")raqm layout engine available: True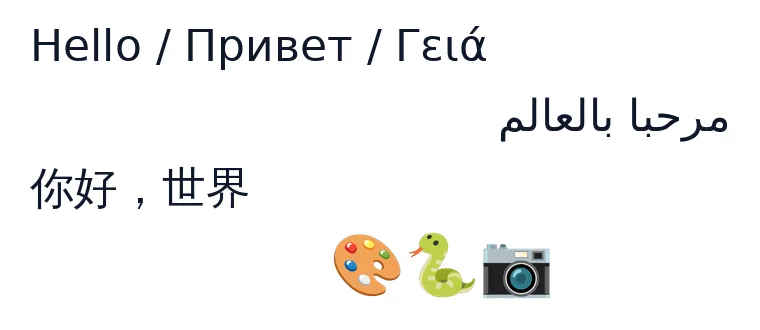
Colour emoji need embedded_color=True. Noto Color Emoji is a bitmap font that only exists at size 109, so any
other size fails:
from PIL import ImageFont

ImageFont.truetype("/usr/share/fonts/truetype/noto/NotoColorEmoji.ttf", 48)OSError: invalid pixel sizeLoad it at 109, draw the emoji on a transparent layer, and resize that layer, as in the script above.
Saving the result
- Text on photos: save as JPEG (
quality=90) or WebP. If you used anRGBAlayer, convert toRGBbefore saving as JPEG, or you will getcannot write mode RGBA as JPEG. - Text on flat colours (banners, social cards): PNG or lossless WebP keep the edges sharp. JPEG adds visible artefacts around text.
Related
The outputs and images on this page are the real results of running every example with Pillow 12.3.0 on Python 3.13 (Linux) on 2026-10-15. Every example is also re-run automatically on macOS (Darwin 25.6.0, Pillow 12.3.0), Linux (Linux 6.17.0-1022-azure, Pillow 12.3.0), Windows (Windows 2025Server, Pillow 12.3.0); the line under each example shows the result per operating system. The DejaVu Sans font files sit next to each script so font examples behave the same everywhere. Sample photos: NASA/Sam Lott, public domain. Spotted something wrong? Tell us.